How to Use Your Company Email in Gmail – A Step-by-Step Guide with Screenshots

Almost everyone who works at a company or organisation is given a work email account. Quite a lot of people want to use that email account through the Gmail interface – in other words, by linking it to their personal Gmail account. In this post, I’ll explain how to set up and use a work email account through the Gmail interface.
Setting Up Work Email in Gmail
First, sign in to your personal Gmail account, then click “Settings”, shown by the cog icon at the top right.
This takes you to the “General” tab in Settings. What we need, though, is the “Accounts and Import” tab, so click on that.
Scroll down a little and you’ll see the “Send mail as” heading. Click “Add another email address” in this section.
A new small window pops up.

In the “Name” field, enter your own name – or, if you’re representing a department you work in (accounts, advertising, etc.), that department’s name. Enter your work email address in the “Email address” field and click “Next Step”.

Leave the “SMTP Server”, “Port” and “Username” fields as they are, unless your company’s IT department has given you different text or numbers. Likewise, unless you’ve been told to select “SSL”, leave the default “TLS” selected. Enter the email password you’ve been given in the “Password” field and click “Add Account”.

Now, to verify all this, you need to enter the confirmation code that will be sent to your work email address. The code may take a few minutes to arrive. If it doesn’t show up in the Gmail interface, you can log in to your work email’s webmail page (for example, webmail.onursendere.com) with the same email address and password, and you’ll find the code in the inbox.
Now that we’ve completed these steps successfully, we can send emails from our work address through the Gmail interface. Next up is getting the emails sent to our work address to arrive in the Gmail interface.
Once again, click the “Settings” icon and go to the “Accounts and Import” tab. This time, click “Add a mail account” in the “Check mail from other accounts” section.
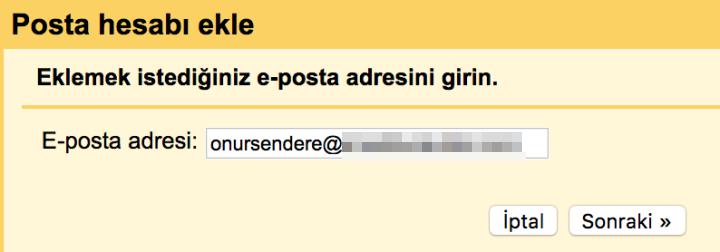
Another small window opens, where you enter your email address. Then click “Next”.
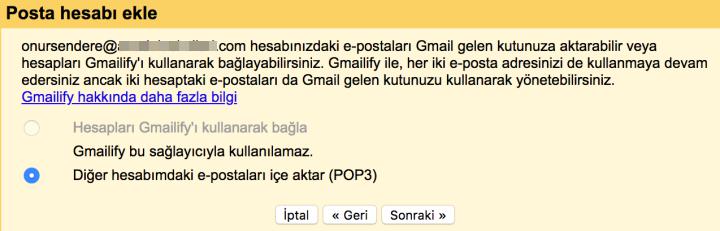
In the window that appears, click “Next” without changing anything.

Here, enter your full email address in the “Username” field, and the password for the email address you’ve been given in the “Password” field. The “POP Server” and “Port” stay at their defaults (unless you’ve been given a different address). If you want a copy of the emails you receive to stay on your work email server too, tick the first option. If you’ve been told you need to use SSL, tick the second option. If you’d like to see emails sent to your work address under a label in Gmail’s left-hand menu, tick the third option. Then click “Add Account”.
If the details you’ve entered are correct and there are no technical problems, the small window will close, and from now on you’ll be able to send and receive your work email through the Gmail interface.
Comments
Comments on this post are collected under the original Turkish version. You’re welcome to write in English.
Go to the comments